This little script can take a Screenshot in custom resolution and with the option to render a transparent background. This might come in handy when you want to create renderings of in-game assets from within the Unity Editor, like characters or vehicles.
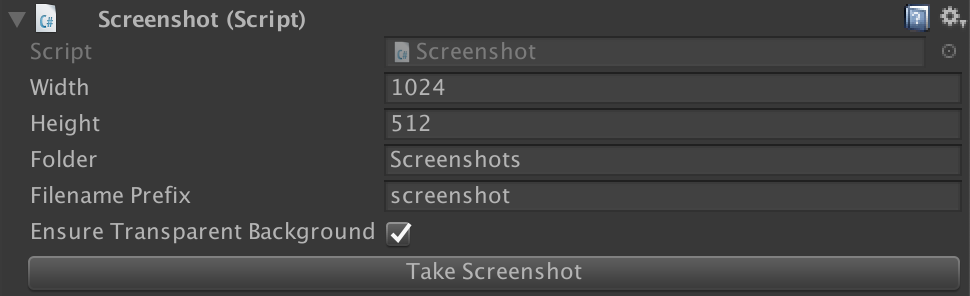
The perspective of the Screenshot is defined by a Camera component that is attached to the same GameObject. So it is possible to modify the position, rotation and focal length through the Transform of the GameObject. All of this is possible without the need to run the scene. Simply click the “Take Screenshot” button in the Inspector.

Here is the implementation:
using System;
using System.IO;
using UnityEngine;

[RequireComponent(typeof(Camera))]
public class Screenshot : MonoBehaviour {

    [SerializeField] int width = 1024;
    [SerializeField] int height = 512;
    [SerializeField] string folder = "Screenshots";
    [SerializeField] string filenamePrefix = "screenshot";
    [SerializeField] bool ensureTransparentBackground = false;


    [ContextMenu("Take Screenshot")]
    public void TakeScreenshot() {
        folder = GetSafePath(folder.Trim('/'));
        filenamePrefix = GetSafeFilename(filenamePrefix);

        string dir = Application.dataPath + "/" + folder + "/";
        string filename = filenamePrefix + "_" + DateTime.Now.ToString("yyMMdd_HHmmss") + ".png";
        string path = dir + filename;

        Camera cam = GetComponent<Camera>();

        // Create Render Texture with width and height.
        RenderTexture rt = new RenderTexture(width, height, 0, RenderTextureFormat.ARGB32);

        // Assign Render Texture to camera.
        cam.targetTexture = rt;

        // save current background settings of the camera
        CameraClearFlags clearFlags = cam.clearFlags;
        Color backgroundColor = cam.backgroundColor;

        // make the background transparent when enabled
        if(ensureTransparentBackground) {
            cam.clearFlags = CameraClearFlags.SolidColor;
            cam.backgroundColor = new Color(); // alpha is zero
        }

        // Render the camera's view to the Target Texture.
        cam.Render();

        // restore the camera's background settings if they were changed before rendering
        if(ensureTransparentBackground) {
            cam.clearFlags = clearFlags;
            cam.backgroundColor = backgroundColor;
        }

        // Save the currently active Render Texture so we can override it.
        RenderTexture currentRT = RenderTexture.active;

        // ReadPixels reads from the active Render Texture.
        RenderTexture.active = cam.targetTexture;

        // Make a new texture and read the active Render Texture into it.
        Texture2D screenshot = new Texture2D(width, height, TextureFormat.ARGB32, false);
        screenshot.ReadPixels(new Rect(0, 0, width, height), 0, 0, false);

        // PNGs should be sRGB so convert to sRGB color space when rendering in linear.
        if(QualitySettings.activeColorSpace == ColorSpace.Linear) {
            Color[] pixels = screenshot.GetPixels();
            for(int p = 0; p < pixels.Length; p++) {
                pixels[p] = pixels[p].gamma;
            }
            screenshot.SetPixels(pixels);
        }

        // Apply the changes to the screenshot texture.
        screenshot.Apply(false);

        // Save the screnshot.
        Directory.CreateDirectory(dir);
        byte[] png = screenshot.EncodeToPNG();
        File.WriteAllBytes(path, png);

        // Remove the reference to the Target Texture so our Render Texture is garbage collected.
        cam.targetTexture = null;

        // Replace the original active Render Texture.
        RenderTexture.active = currentRT;

        Debug.Log("Screenshot saved to:\n" + path);
    }

    public string GetSafePath(string path) {
        return string.Join("_", path.Split(Path.GetInvalidPathChars()));
    }

    public string GetSafeFilename(string filename) {
        return string.Join("_", filename.Split(Path.GetInvalidFileNameChars()));
    }
}
And the Editor script to show the “Take Screenshot” button in addition to the context menu entry:
using UnityEngine;
using UnityEditor;

[CustomEditor(typeof(Screenshot))]
public class ScreenshotEditor : Editor {

    public override void OnInspectorGUI() {
        DrawDefaultInspector();

        if(GUILayout.Button("Take Screenshot")) {
            ((Screenshot)serializedObject.targetObject).TakeScreenshot();
        }
    }
}
Make sure the ScreenshotEditor is saved to a folder named “Editor” since it is using the UnityEditor assembly. Or simply download the Unitypackage.
Feel free to copy and adjust the code to your needs. Please write a comment and tell me what you think or when there is something I could improve!
Thanks, that code was very useful for me.
You are welcome! I’m glad it helped. 🙂
Hey, thanks a lot for this script. It works really well in Unity editor. I just want to know whether it will work on HoloLens 2 to capture the holograms. I am working on Microsoft hololens 2 so asking this. Do you have any idea about it?
Hey Ruchir, Thank you for your message! I wrote the script to make fast screenshots of assets in the Editor. I haven’t tested it on HoloLens, but you could try to call the `TakeScreenshot` function during runtime, for example via button press.
Hi,
neat script, though I had to change the “depth” of the render texture from “0” to 24 and disable the linear gamma correction. I am using URP and linear color space, no depth texture. Just wanted to let you know. Do you have a github repo for this to send push requests to?
Anyhow, thanks for this little helper.
Hi Geo,
I am so sorry! Somehow this comment slipped through and I didn’t approve it for such a long time! :/
Anyways, better late than never. Thanks a lot for your feedback! There’s currently no repo, but I like the idea! I will try to look at the changes you stated manually the next days and make an update if it’s still applicable with the new versions of Unity.
Sorry and thanks again!
Chris
Hi Chris,
no worries. I realised just now that the comment went online.
I have uploaded my additions to your code here (in case anyone is interested):
https://kamgam.com/unity/EditorCameraScreenshotComponentScript.zip
Cheers,
Geo(rge)
Hello. It does not capture Unity UI. Can you update it please?
Hi Gökdeniz,
Thanks for your comment. It is not really meant to capture UI. I made it to create transparent screenshots within the Editor. But feel free to adjust it to your needs. There should be a way to capture UI as well.
And if you want to take a normal screenshot during runtime, simply use CaptureScreenshot.
I hope that helps.
Chris